


Content Hub Connections: Azure app
Estimated reading time: 3 minutes
Creating a Connection
To use SharePoint or PowerBi in your Content Hub you need to give the NCH permission to fetch content. To do this you first need to create an app in Azure and connect this to your NCH. After this is done you need to map a Connection in the NCH. The steps below will guide you through this process.
Creating the Azure app
- Go to https://portal.azure.com/#view/Microsoft_AAD_IAM/TenantPropertiesBlade
- Copy the Tennant ID and save it for later.
- Click on Home and search for “Enterprise applications”
- Open Enterprise applications to start creating the app
- Click “new Application” -> “Create your new application.” If this option is grayed out your account does not have the permissions needed to create an app. Sign into an admin account that does have these permissions.
- Give the app a name so you can easily identify what the app is used for
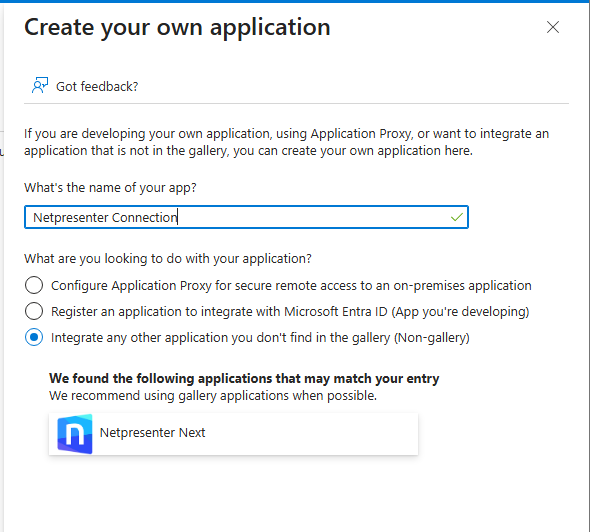
Important: Do not select the Netpresenter NEXT application.
- Click Create, this can take a minute or 2 to be created.
- Copy the application ID and save it for later.
- In the left menu go to permissions and click application registration.
- Add the permissions
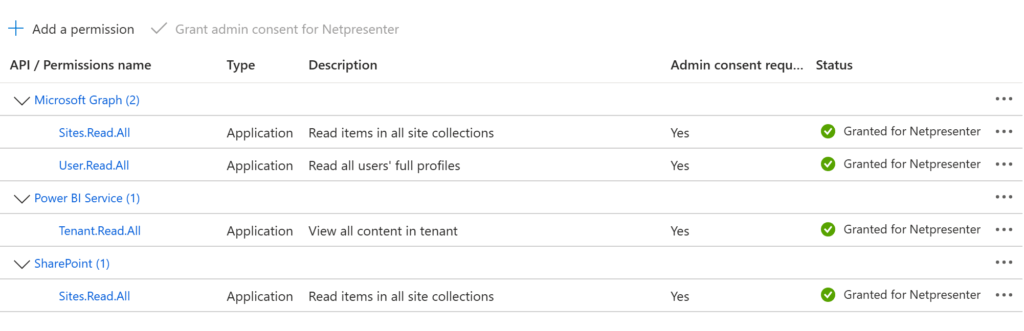
With these 4 permissions your app can be used for both PowerBi and Sharepoint.
- Click the “Grant admin Permissions” button at the top of the permissions overview.
- Go to App registrations and find your app.
- Once the App overview displays click on Certificates & Secrets.
- In a separate window download the certificate: https://support.netpresenter.com/azure/NetpresenterNCH_Certificates.zip
- Unzip the certificate.
- Going back to Azure, click “Upload a certificate” and add the certificate.
This completes setting up the Azure app.
Continue