


Content Hub Connections: Sharepoint
Estimated reading time: 3 minutes
Creating a Connection
To use SharePoint or PowerBi in your Content Hub you need to give the NCH permission to fetch content. To do this you first need to create an app in Azure and Connect this to your NCH. After this is done you need to map a Connection in the NCH. The steps below will guide you through this process.
Follow this guide first to set up the Azure side:
Creating the Connection in the NCH
Go to your content hub and open Settings > External Sources > Connections. Click the Add new button and complete the form. Select your connection type, SharePoint or PowerBi. If you want to use both you will need to create 2 connections.
You should have the Tenant ID and Application ID stored from the previous steps.The Tenant name is the name of your Microsoft environment. For instance if your URL starts with https://netpresenter.sharepoint.com/ then netpresenter is your tenant’s name.
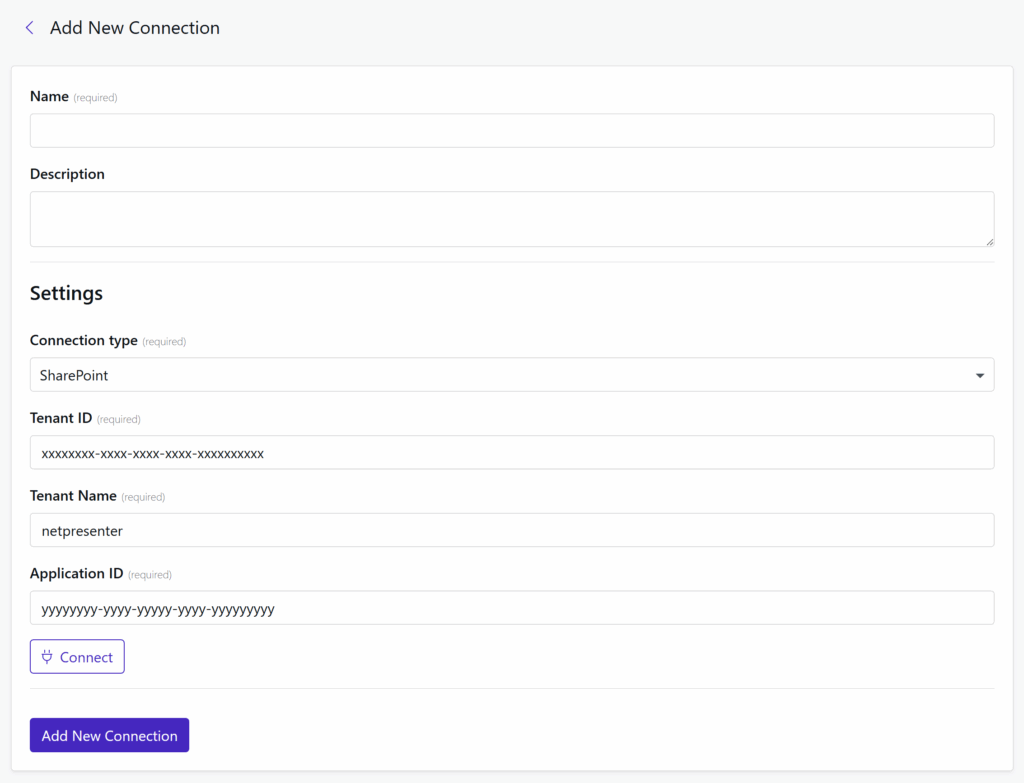
Click on connect and save the connection. The connection between SharePoint/PowerBi and the NCH is now complete. And SharePoint or PowerBi can now be used as an External Source.
(Optional) Only allow access to specific Sharepoint sites
When connecting SharePoint to your Azure app, it is not always desired to connect all sites to our Netpresenter Content hub. It is possible to select the sites that you will grant Netpresenter access to.
App registration
Add the Site.Selected SharePoint permission to your app instead of Sites.Read.All
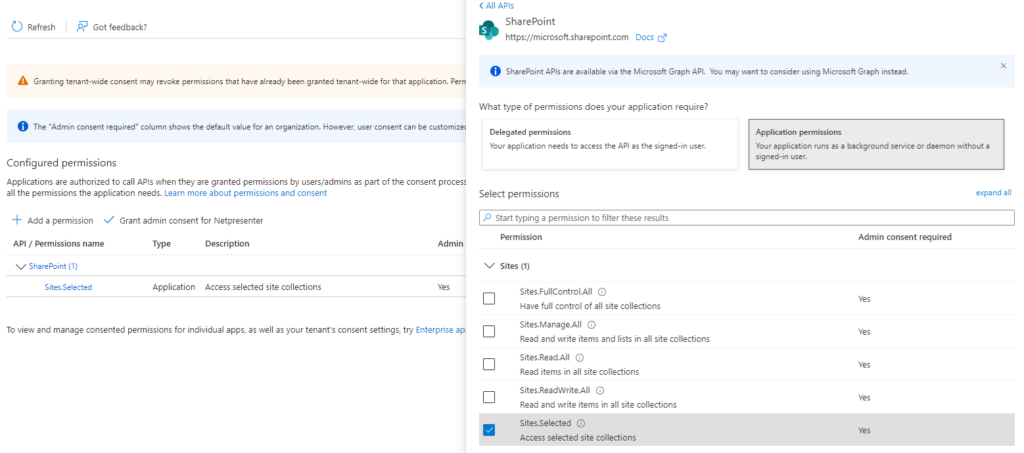
Grant permissions with the admin user.
Take note of the Application ID and name.

Grant SharePoint site permissions
Open PowerShell as administrator.
Make sure you have PowerShell v7.2 or higher. To update, use the following command:
winget install --id Microsoft.Powershell --source winget Open PowerShell 7 and Run the following command first to install PnP.PowerShell:
Install-Module PnP.PowerShell Then copy the following text.
$targetSiteUri = 'https://xxxxxx.sharepoint.xom/sites/subsite' connect-PnPOnline $targetSiteUri -Credentials AdminUserName Grant-PnPAzureADAppSitePermission -AppId 'Azure Application ID' -DisplayName 'Azure Applcation Display Name' -Site $targetSiteUri -Permissions Read Make sure to add the correct site URI, App ID and App Name
Sources
Information on the PNP Module can be found here: https://pnp.github.io/powershell/