


Content Hub Connections: PowerBi
Estimated reading time: 3 minutes
Creating a Connection
To use SharePoint or PowerBi in your Content Hub you need to give the NCH permission to fetch content. To do this you first need to create an app in Azure and Connect this to your NCH. After this is done you need to map a Connection in the NCH. The steps below will guide you through this process.
Follow this guide first to set up the Azure side:
PowerBi Admin Settings
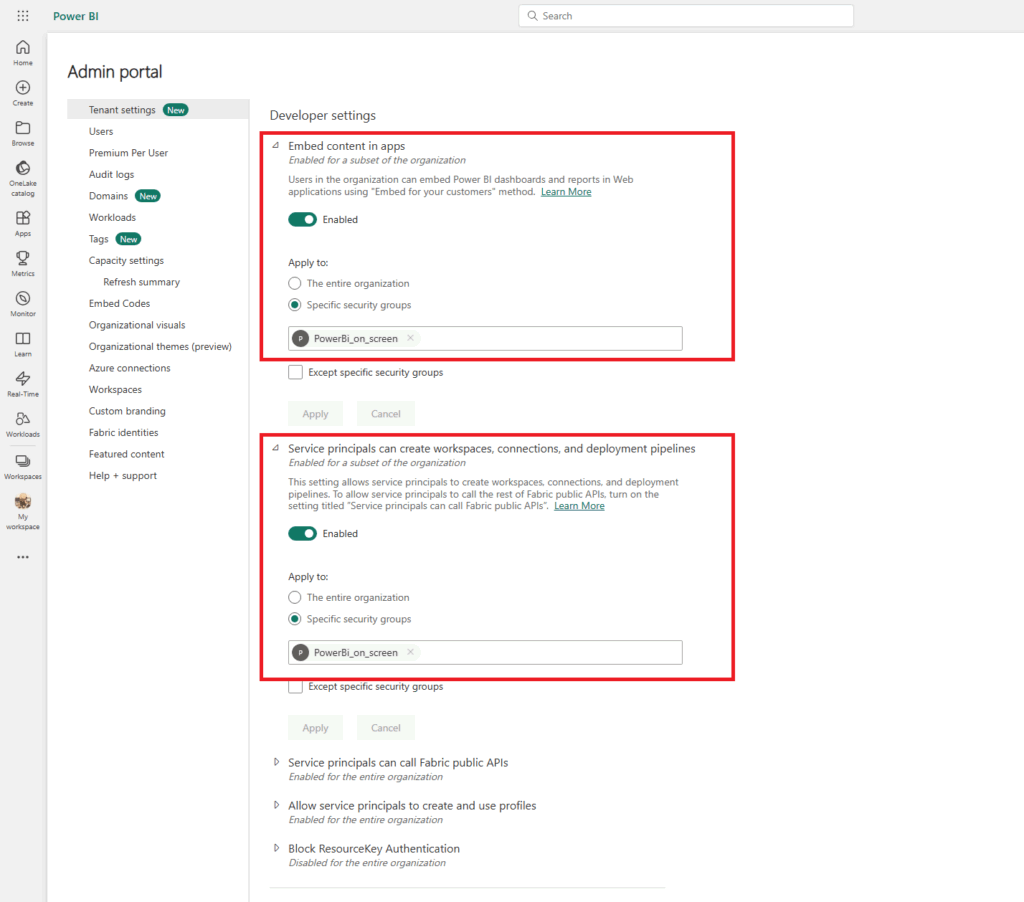
Go to https://app.powerbi.com/admin-portal/. Open Tenant Settings and scroll down to the Developer Settings. Make sure the “Embed content in apps” and “Service principals can create workspaces, connections, and deployment pipelines” options are enabled.
To control who can create dashboards we advise to create a group for this in Azure first.
Now open your PowerBi and create a new Workspace or give your usergroup Admin access to the Workspace you want to display.

Creating the Connection in the NCH
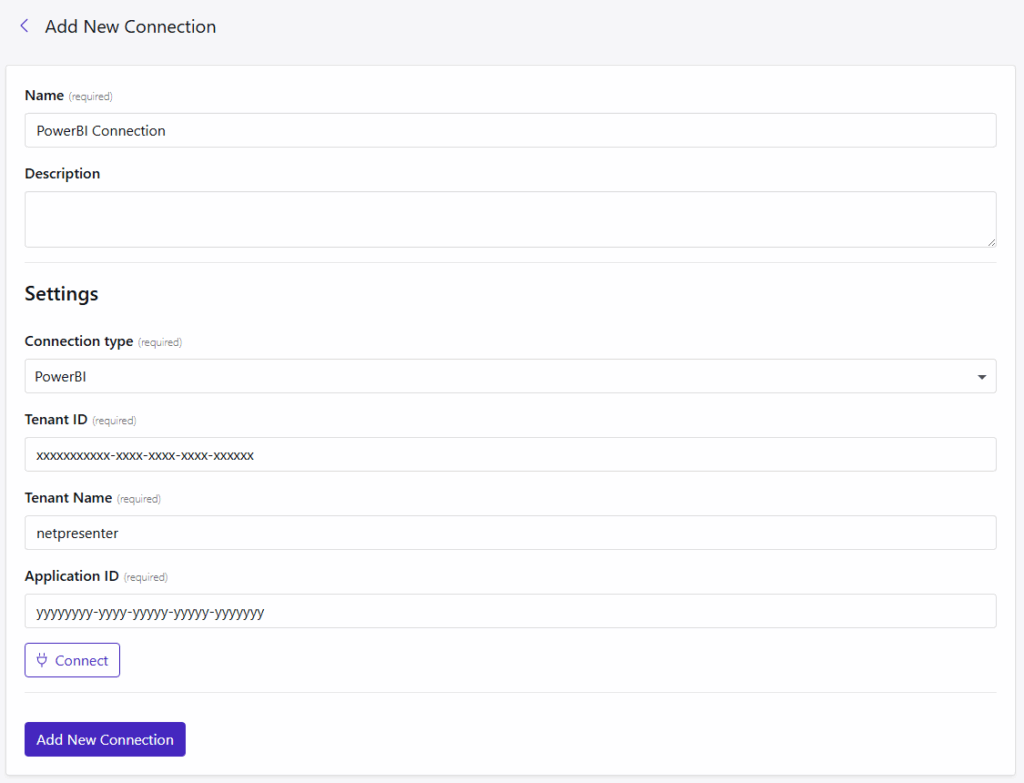
Go to your content hub and open Settings > External Sources > Connections. Click the Add new button and complete the form. Select your connection type PowerBi.
You should have the Tenant ID and Application ID stored from the previous steps. The Tenant name is the name of your Microsoft environment. For instance if your URL starts with https://netpresenter.sharepoint.com/ then netpresenter is your tenant’s name.
Click on connect and save the connection. The connection between PowerBi and the NCH is now complete. PowerBi can now be used as an External Source.